Essential Steps for Your DIY Shed

Have you ever dreamed of building your own DIY Shed? Are you tired of running out of space in your garage , house? Are you sick of paying $80 a month on renting a storage unit? I’ve been there and done that. So looking for a solution I got the bright idea of building a shed. If you are a DIY guy like me then you know having a plan is imperative. Finding plans is the easy part, the hard part is finding plans that show step by step instructions can be a daunting task if you have never built a building, and you really dont like playing the guessing game on how something should be done. So lets focus on getting our thought in order and make Your DIY Shed a reality.
Why build a DIY Shed?
A DIY Shed isn’t just a building – its a game-changer. Need a spot for your tools? A quiet retreat? Maybe a gardening hub? What ever your goal is, building it will will save you money compared to buying a kit that is made from cheapest wood and products you might find on some china website, or calling the pros out who charge anywhere from $1500 to $3000. Plus you get full control of size, style and features to fit all of your needs.
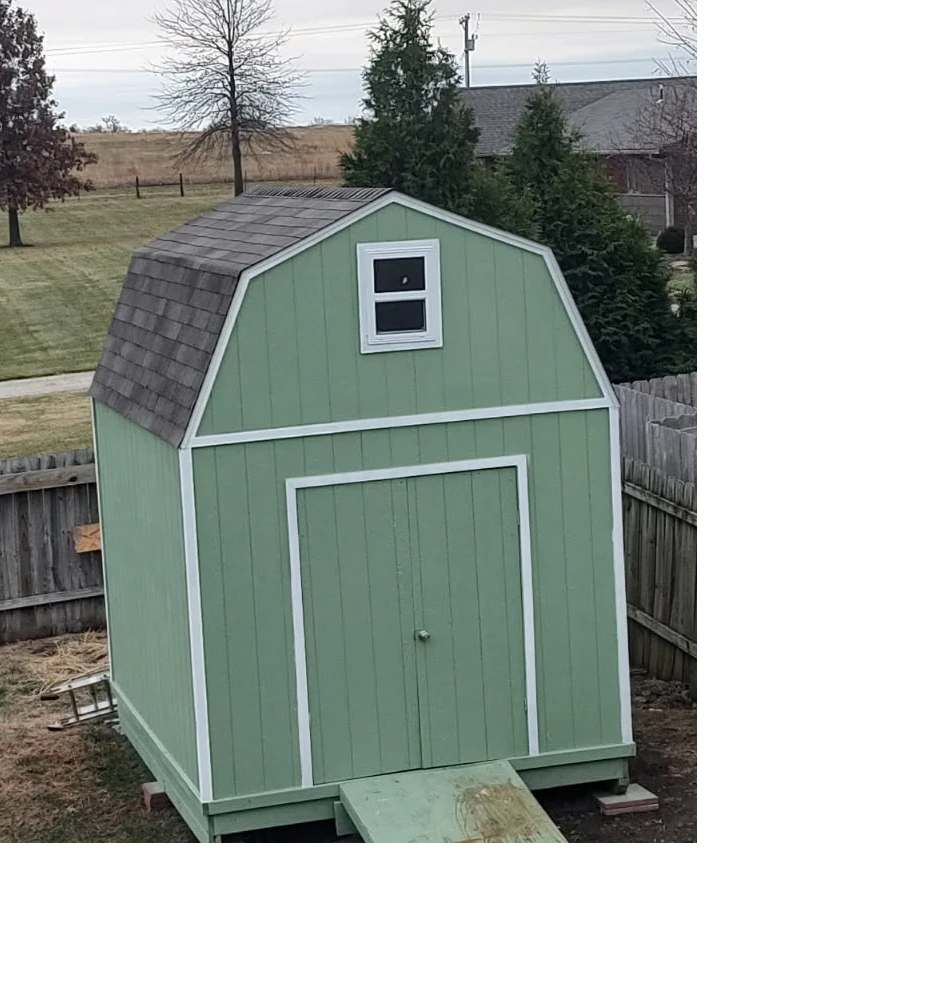
I built my first shed last summer. I built a 10×12 shed with a loft for under $1000 and that was with the trim and paint and roofing. A solid DIY Shed starts with knowing what you want and having great easy to read blueprints. If you skip that then your shed that you spent your hard earned money on might not turn out the way you planned. Skipping this crucial step and you might have leaning walls or a leaky roof. This would be learning from the house of hard knocks. So when I found these professional DIY Shed plans I knew my shed would go up without a hitch.
1: Plan Your DIY Shed
Every DIY Shed begins with a plan. Weather its in your head or on paper the plan has to come from somewhere. So whats the purpose? The purpose is to make sure you dont skip steps and everything comes together. An 8×10 shed plans works great for storage, but a 12×16 Shed Plans might suit a workshop. Before you decide to build check your city and see what zoning laws that require permits. I. So my next process was where did I want it located? You dont want to locate it in the low spot of your yard? Why? water isnt your sheds friend and putting it in a low spot causes problems.
2: Gather Materials and Tools
For a basic DIY Shed Plan, you’ll need lumber (2×4’s, Plywood) nails, screws, a foundation (concrete blocks or slab) if its like mine you’ll need some patio bricks to set your skids on if you plan on making it movable. A skid setup will cost less than a concrete slab. Roofing, or metal if you want a metal roof. Tools? A hammer, saw, drill, level and a tape measure are must haves. If you plan on building other things you should buy a circular saw. I never rent tools I plan on using over and over. And If you have a cutoff saw that is a major plus. (it makes cutting wood a breeze and your more likely to have amazing square cuts.
3: Building the base
I started out shoveling out the area with a round tip shovel and cleaning it out with a flat shovel to get a nice level surface next I placed patio block on the edges where the floor frame was going to set. Cutting the boards 4×4’s to length where the front and back 4×4’s set on the inside of the side boards. I then used a drill bit to pre-drill the board where the lag screws wouldn’t snap off as I used my impact driver to install the lag screws.
I then put supports in the center and secured the other 4×4’s together. Once that was done it wast time to put the floor supports in and screw them together. I then started installing the 3/4 ply board to the floor frame (don’t use particleboard or chip board) use the good stuff otherwise you will regret it.
4: Frame and Assemble
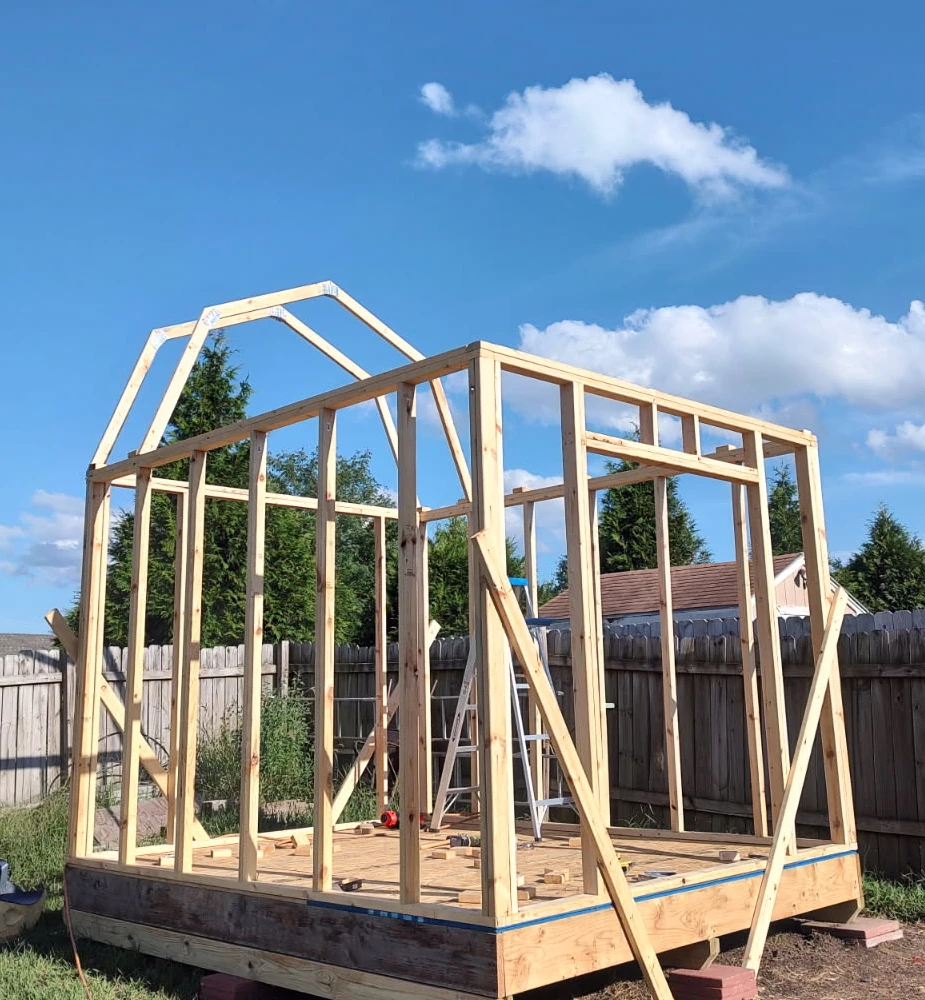
Framing your DIY shed is the fun part! For 12ft side walls, cut bottom and top boards to 12ft—double-check measurements, as mill cuts vary. For 8ft walls, cut studs to 91.5 inches to account for a header board tying it all together. Do the math before cutting. Next, cut two 2x4s to 14.5 inches for spacing. Screw a stud to the bottom board, then the top board to the other end. Double-stud the ends for strength, nailing or screwing them together. Place a 14.5-inch 2×4 flat against the bottom board, set the next stud against it for 16-inch centers, and repeat across the wall. Once all walls are framed, stand them up and nail them to the floor base. For detailed blueprints, I used these plans—they made framing a breeze!
5: Putting The Siding on
Once your walls are framed (windows cut out if desired—I skipped them except in the loft for security), it’s time to add siding. I stood the walls up without siding for easier lifting, or attach it first with help. I then raise and anchor them with nails or lag screws—my choice. Lag screws offer more strength. I Ensured walls are plumb (straight up and down) using a level, and brace them with long 2x4s to prevent tipping in strong winds before they’re tied together. For my shed, I followed these plans—they kept everything square and secure from start to finish.
6: Finishing up This Project
While finishing up this DIY Shed I discovered an easier way to put the trusses up and that was to put the loft and stairs in first. Why? because it gave me a place to stand and install trusses. Once I got the sheathing done it was time for the tar paper and drip edge then complete the roofing. This whole project took me about 2 weeks between my job and project, it saved me a bundle. If you want your shed done right This Is my go to for Simple easy way to build your shed.

Conclusion:
In building my own shed it taught me how to put together plans that gave me a sense of self gratitude and fulfillment that not everyone gets a chance to have. Having the knowledge of this experience I plan on building a 20×30 barn at the lake to keep my boat and jetski in. Thanks for reading my story and hopefully you can have and experience of building a she or barn or a DIY Shed.
Affiliate disclaimer: I earn a small commission from links found on this page at no cost to you.